SAMMI HD
*Updated 1 Sep 2014*
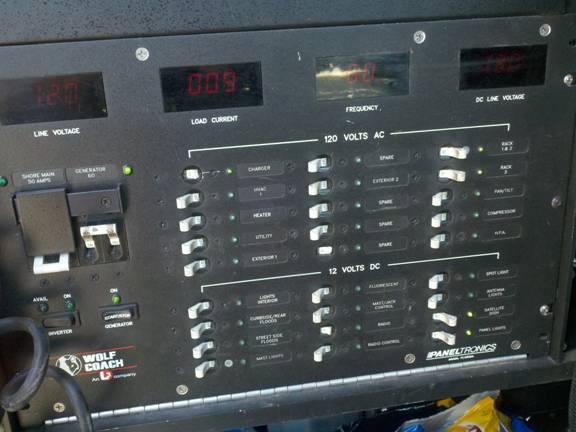
Normal start up for generator and turning
on racks and any breakers needed.
|
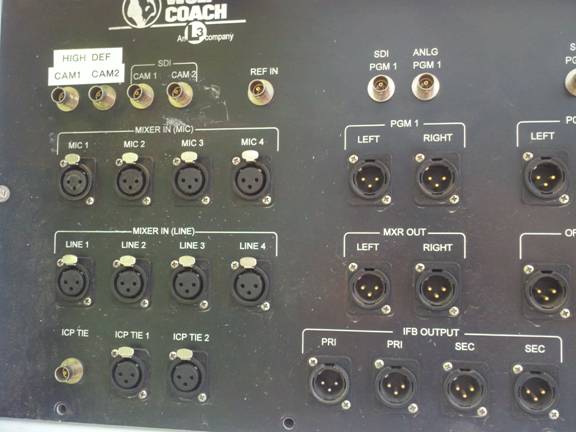
Use the new switcher in right rack for
Camera and Avid. Plug camera into
HIGH DEF Cam 1 or Cam 2.
Audio should be on embedded run through
camera (turn down ch.2) to use the mixer
audio see Frame sync instructions.
 |
HD Mojo:
Turn on Avid lap top (MoJo should power up)
Avid start up: Make sure HD-SDI is flashing
|
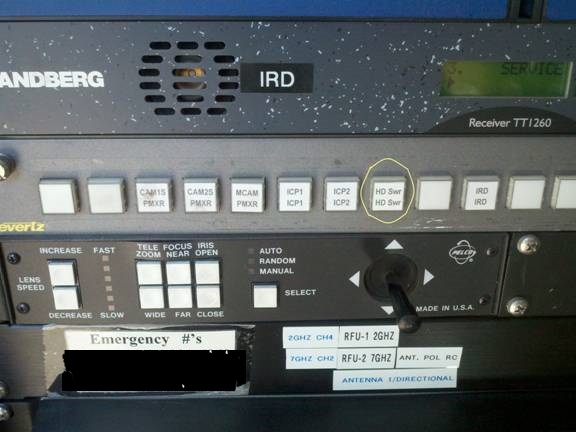
HD switcher set to “HDCAM” or “Avid”
|
Program 1 switcher set to “HD SWR”
for Sat and Microwave
 |
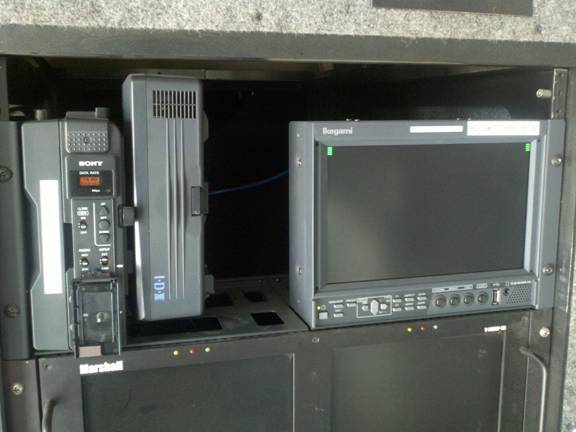
Sony HD to ASI converter should read
1080-60i
 |
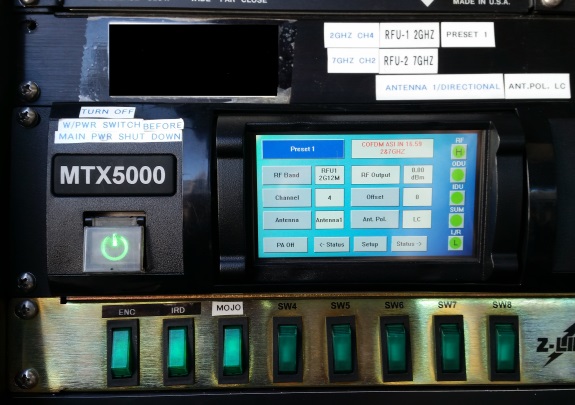
Microwave:
Updated 1 February 2015- There is only Preset 1 now.
2Ghz CH. 4 OR CH.7
7Ghz CH. 2 Only
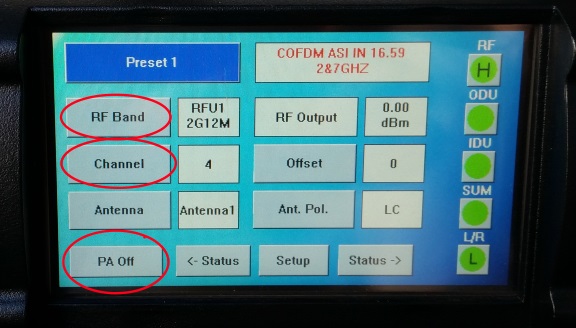
RF Band: Press to select either 2 GHz OR 7 GHz band only, does not change channel.
Channel: Press to change channels on 2 GHZ Band - either CH4 OR CH7.
There is only one channel on 7 GHz band, Channel 2.
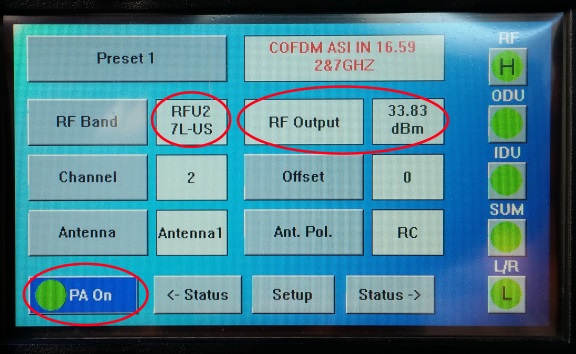
PA Off: Press to toggle transmitter on and Standy. PA is off in this mode. Note RF output shows 0.00 dBm |
PA ON: Transmitter is in Transmit mode, not standby.
Note, RF Output shows full power output at 33.83 dBm.
Note, RF Band shows RFU2 7L-US. Unit is on 7 gHz band, CH. 2. |
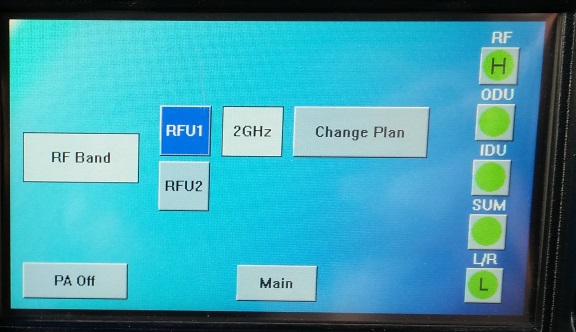
RF Band Button Pressed: Shows available RF Band, 2 or 7 GHz.
Press RFU1 to to select the 2 GHz band.
Press RFU2 to select the 7 GHz band.
DO NOT press the "Change Plan" button, it is for Engineering and Programming use only. |
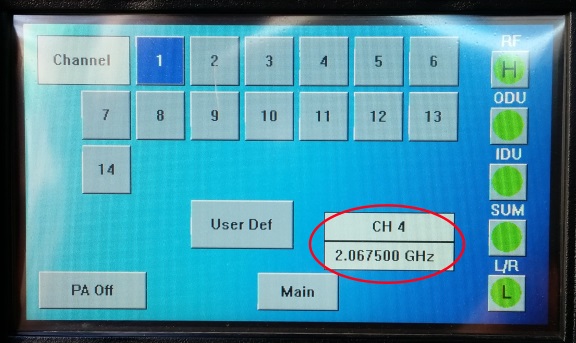
Changing Channel on 2 GHz Band:
Press the Channel button from the main screen to change the channel on RFU1 (2- GHz Band).
Choose either Channel 4 OR Channel 7, NO others.
DO NOT change channel on RFU2 (7 GHz Band). It should ONLY be on Channel2.
Note: In the below picture, the transmitter is shown in Channel 4, NOT Channel 1 as may be thought.
|
VERY IMPORTANT!!!! When finished with a live shot, first power down the MTX5000 FIRST with the green power button under the MTX5000 label.
DO NOT simply shut down the Rack power or the tranmsitter will most probably need to be reprogrammed before it can be used again!!! |
|
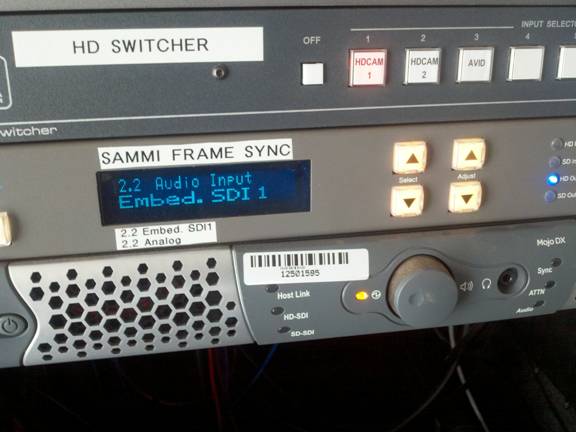
Frame Sync:
Normal audio should be Embedded SDI 1
using mic plugged into ch.1 on camera
(turn down ch.2)
To change to audio using mixer use select
button to scroll up or down to
“2.2 Audio Input” Then use adjust button
to scroll up or down to Analog.
 |
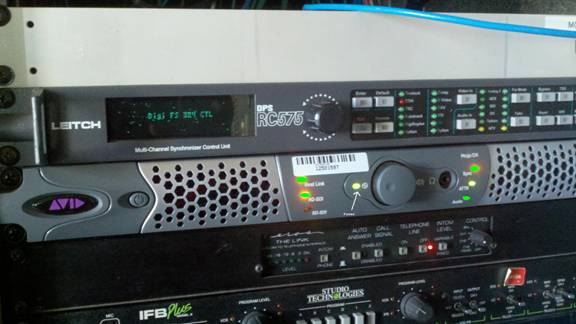
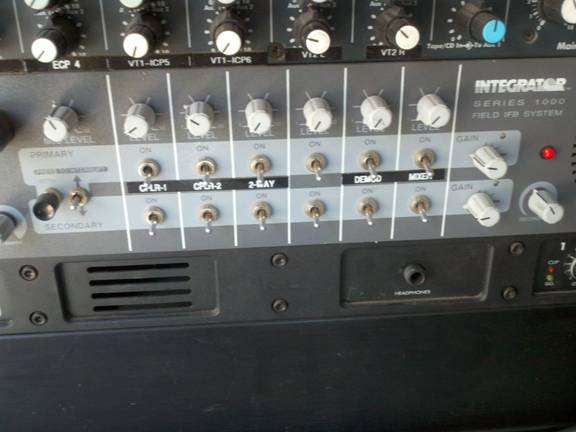
IFB:
Call IFB number after it connects lift both
the left hand switches labeled
CPLR-1 (if you use phone1)
or CPLR-2 (if you use phone 2)
Level adjustment is above the switches
 |
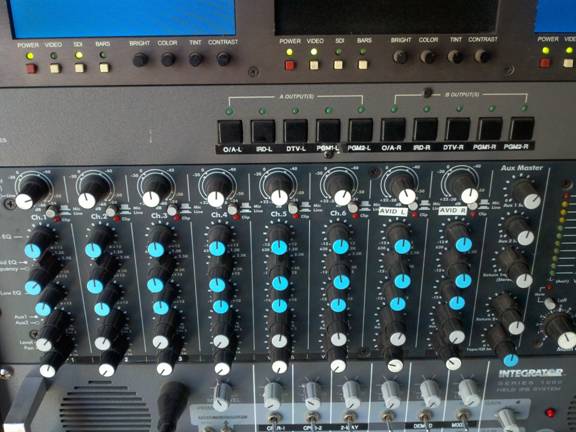
Audio Board:
If using Analog audio the mic’s will come in
on Ch1 or Ch2 (left side of audio mixer).
Avid is on Ch7 and Ch8.
 |
Satellite Controls
*Please allow at least 8 minutes for the
TWT to warm up!
Also, when finished with an uplink,
please allow at least ten minutes for
TWT cooldown.*
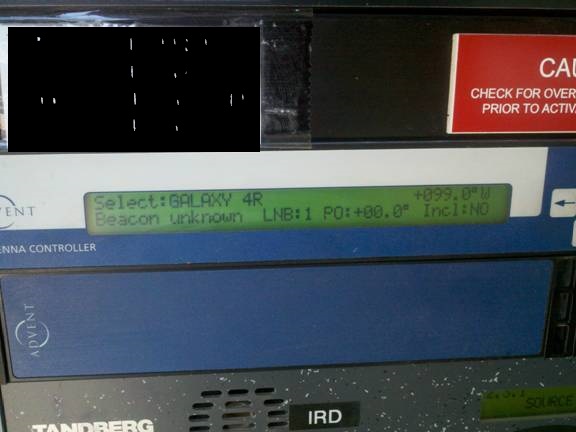
Antenna controller: After it warms up press
“escape” then “enter” to look for
“Galaxy 4R” (now Galaxy 16)
“press “enter” to start the dish in motion.
 |
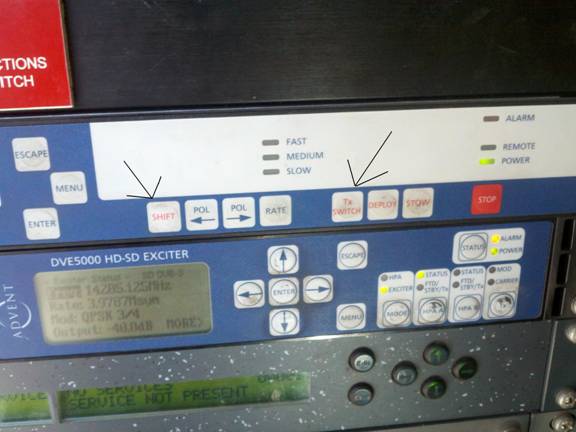
After it stops first thing is to press
“TX and Shift” at the same time, this
changes the polarity to Horizontal.
Then adjust azimuth and elevation to
look for Galaxy 16.
 |
Hint: look for the satellite that is two
to the left of Galaxy 16 it is the only one
to have information
to the left of 11700MHz.
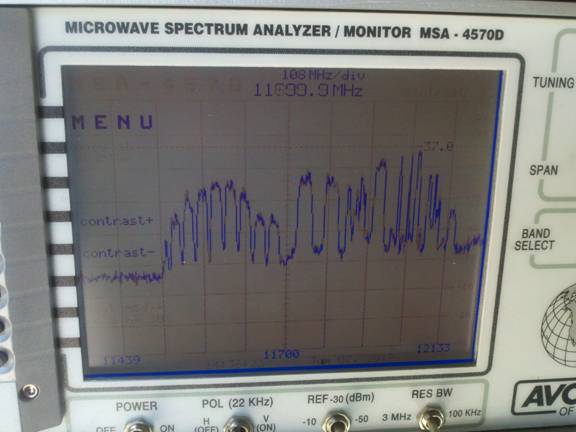 |
This is what Galaxy 16 looks like.
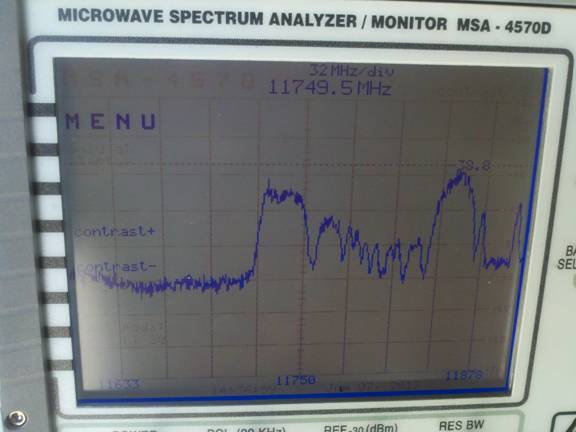 |
Down Link Frequency set up: scroll through
to set up controller as 2-3-1 then push “edit”
and program in frequency, then press “save”.
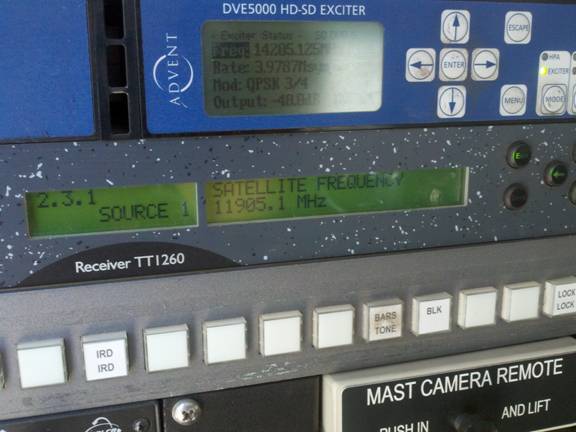 |
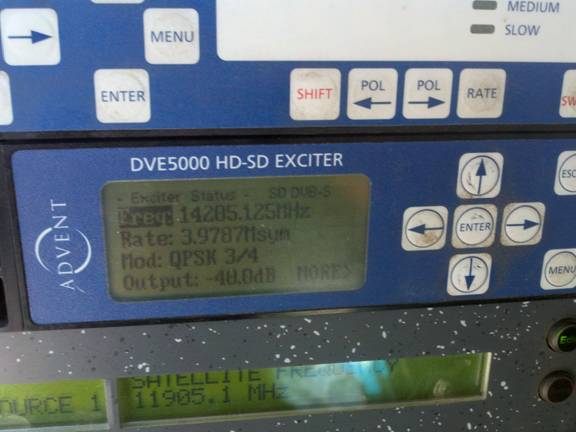
Set up-link frequency: Press “enter” then use
left-right and up-down arrows to program
in your assigned frequency then press
“enter” again.
|
To access bird: first switch to HP side and
press enter, then move power one to the left.
Come up clean carrier (1.)
When told by access, bring power up and
then press MOD (2.) normal power level
around -21dB
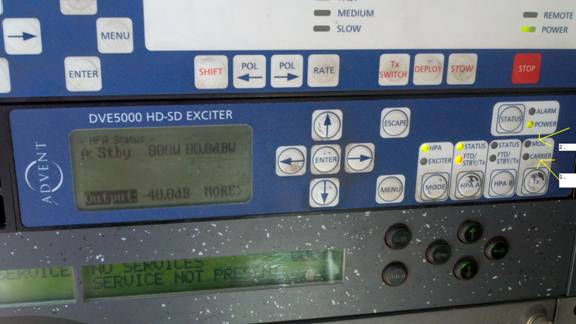 |
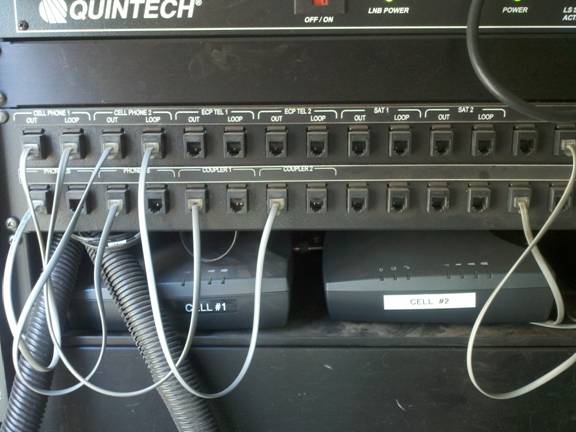
Phone Patch:
Below is normal set-up for the phone patch.
If you need to use sat phones move both top
patch cords for each phone from Cell Phone
out and loop to Sat out and loop.
You will need to type in pin on each sat phone
then you can use the wall phones to make calls.
You will need to push “001” before the area
code and number you are calling.
Hint: when calling a 1-800 number it will give
you a warning the call will not be free,
just accept charges.
|
Iridium Phone
The unlock procedures for the Iridium sat
phones are:
Please check in the truck for this info.
If not there, please call the Assignment Desk.
|
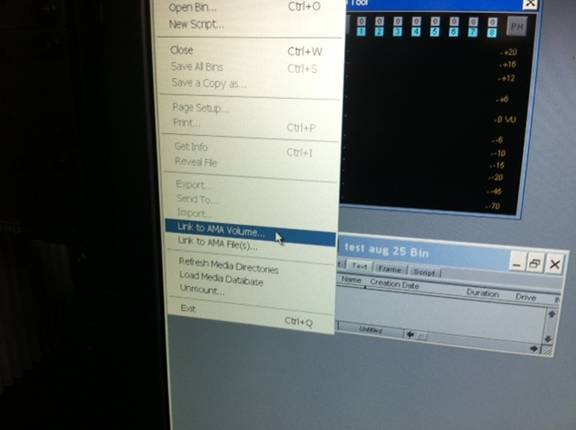
Editing on Avid Lap Top
The SxS reader will not load up clips in AMA
bin automatically, you will need to click:
File>Link to AMA Volume
 |
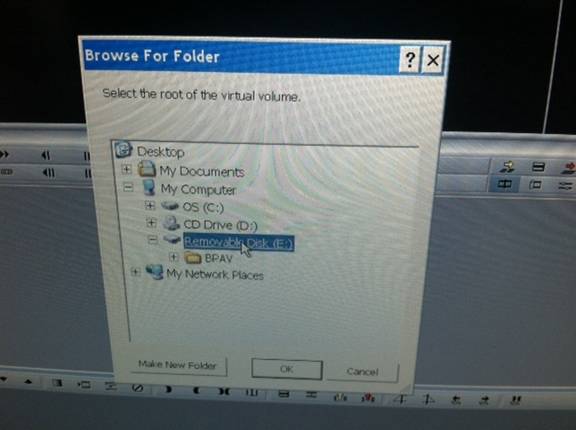
Click on My computer>Removable disk
(E) or (F) > OK
(You should see a folder called BPVA below)
 |
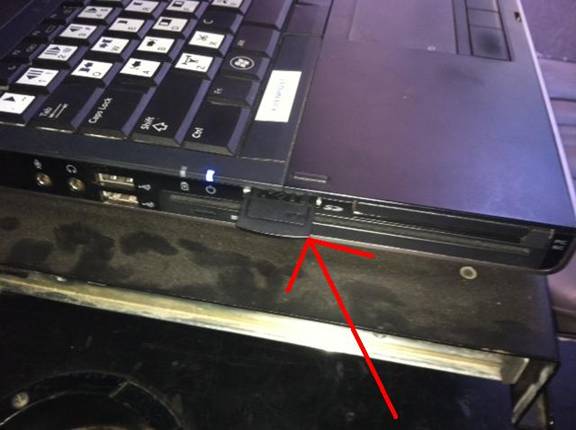
When using a SDHC card with adaptor,
remove the card and place in the slot on the
left side of the LT. The procedure is the
same as above.
(If you get an error the first try just click out
and try again it will load clips the second time)
IF you need to remove a card for more video
on a second card or audio track you must
consolidate your clips (same as station)
before you remove your card.
Information and pictures courtesy Carey Olson
|
|